Install LAMP on CENTOS 9 or RHEL 9
LAMP is a popular open-source software stack used to build and run dynamic websites and web applications.
The acronym LAMP stands for:
- Linux: The operating system that hosts the environment.
- Apache: The web server that processes requests and delivers web pages.
- MySQL: The database system that stores application data.
- PHP: The server-side scripting language that connects everything together.
When a user visits a website, the process flows like this:
- Apache receives the request from the user’s web browser.
- Apache passes the request to PHP to process.
- PHP communicates with the MySQL database to fetch or update data (like user profiles or product listings).
- PHP processes this data, generates clean HTML code, and hands it back to Apache.
- Apache sends that HTML page back to the user’s screen.
Key Benefits
- Completely Free: Every component is open-source with no licensing fees.
- Highly Compatible: PHP integrates seamlessly with Apache and MySQL out of the box.
- Massive Community: It powers over 75% of the web, including platforms like WordPress.
In this article, we will show you how to set up a LAMP stack on Red Hat Enterprise Linux (RHEL) 9 and CentOS Stream 9 systems.
Prerequisites
Before you start, you need to have a freshly installed RHEL or CentOS 9 system with a root user or a user with sudo privileges. You also need to have a basic understanding of Linux commands and concepts.
Step 1: Install the Apache Web Server
Apache is the most widely used web server software in the world, and it’s available in the default CentOS 9 repositories. To install Apache, run the following command as root or with sudo privileges:
# sudo dnf install httpd
Install Mod SSL (You’re going to want to support secure HTTPS connections)
# sudo dnf install mod_ssl
Once the installation is complete, start the Apache service and enable it to start automatically at boot time:
# sudo systemctl start httpd
# sudo systemctl enable httpd
To verify that the Apache web server is working correctly, open a web browser and access the server’s IP address or hostname. You should see the default Apache web page, which confirms that the web server is up and running.
Step 2: Configure the firewall to allow HTTP and HTTPS connections
# sudo firewall-cmd --permanent --add-service=http
# sudo firewall-cmd --permanent --add-service=https
# sudo firewall-cmd --reload
Step 3: Install the MariaDB Database Server
MariaDB is a fork of the MySQL database server, and it’s included in the default CentOS 9 repositories. To install MariaDB, run the following command:
# sudo dnf install mariadb-server
Once the installation is complete, start the MariaDB service and enable it to start automatically at boot time:
# sudo systemctl start mariadb
# sudo systemctl enable mariadb
To secure the MariaDB installation, run the following command, which will prompt you to set a root password for the database:
# mysql_secure_installation
Add a non-root user to your MySQL installation
Note: Replace username and password with your desired values
# mysql -uroot -p
(enter password when prompted)
mysql> CREATE USER 'username'@'localhost' IDENTIFIED BY 'password';
mysql> GRANT ALL PRIVILEGES ON database.* TO 'username'@'host';
mysql> FLUSH PRIVILEGES;
Step 4: Install and configure PHP
Now that Apache and MariaDB are installed and running, we can proceed to install PHP. To do this, run the following command:
# sudo dnf install php php-cli php-common php-gd php-mysqlnd php-pdo
After installing PHP, we need to make a few configuration changes to ensure that it works correctly with Apache. Open the `php.ini` configuration file using your preferred text editor:
# sudo vi /etc/php.ini
In the file, look for the following lines and modify them as follows:
memory_limit = 256M
upload_max_filesize = 128M
post_max_size = 128M
Save and close the file.
Step 5: Update Apache config to add PHP handler
Update the httpd.conf file to add a file handler for PHP scripts.
# sudo vi /etc/httpd/conf/httpd.conf
Locate the section of the file that contains AddHandler directives by typing the following:
/AddHandler <enter>
Type o to insert a new line
type the following in the file:
AddHandler application/x-httpd-php(74|80|81|82) .php
Step 6: Test to verify that Apache and PHP are working
To verify that our LAMP Stack is properly installed and configured, we will create a simple PHP script and run it through Apache.
Create a new file named `info.php` in the Apache web root directory using the following command:
# sudo vi /var/www/html/phpinfo.php
Paste the following code into the file:
<?php
    phpinfo();
?>
Save and close the file.
Now, open your web browser and navigate to `http://your-server-ip/info.php`. You should see a page displaying the PHP configuration information. If you see this page, then your LAMP Stack is up and running.
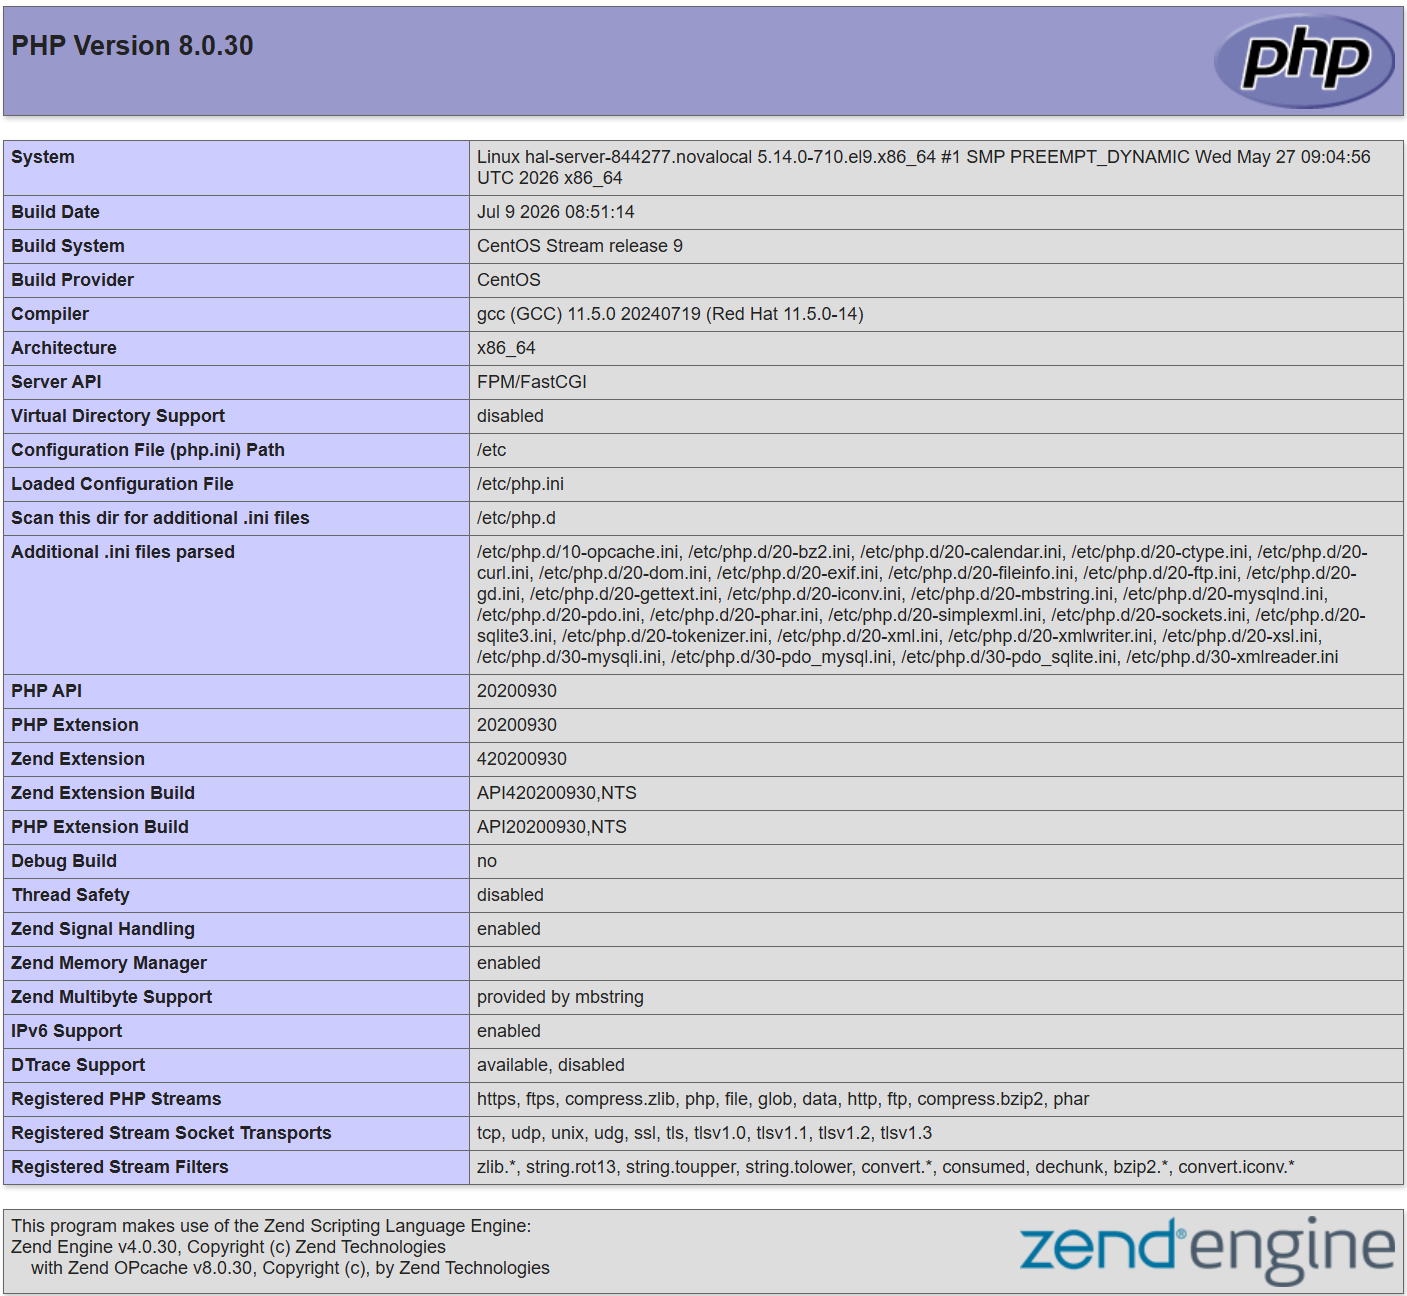
If you see a page like the one shown above, then you’ve succeeded!! You have successfully installed and configured a LAMP Stack on your RHEL or CentOS 9 server.
Conclusion
In conclusion, this step-by-step guide has provided the necessary steps to set up a LAMP (Linux, Apache, MariaDB/MySQL, PHP) stack on RHEL or CentOS Stream 9. This is a straightforward process utilizing the default dnf package manager. The deployment consists of installing the web server, database, and PHP components, and configuring the PHP handler and firewall. Whether you’re a seasoned system administrator or a beginner, we hope that this tutorial has provided the nformation you needed to get your LAMP stack up and running in just a few minutes!